


Page 1 of 1: WMV9 to AVI Guide
This guide will show you step by step how to convert WMV9 movies to divx AVIs.
Files you will need
The divx codec (I recommend the free one, no ads)Virtualdub (the newest one is fine)
Graphedit
TMPGenc
WMV9 Codecs
note: you can also get these codecs by installing windows media player 9.
Otherwise, put the contents of the .tgz into your windows\system\ directory.
Step 1 (Converting the video)
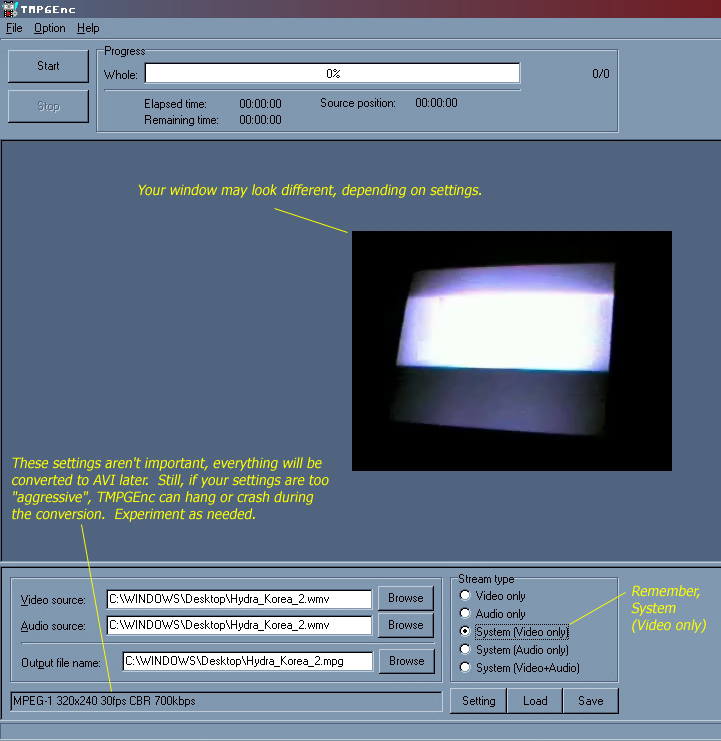
1. Run TMPGenc and click the "Browse" button by video source.In the browser, type *.wmv to make sure the WMV9 movie you want is displayed. Open it.
The audio source field will automatically fill in. Choose an output path and filename.
2. Click the radio button next to "System (Video only)" .. for settings, you can
do whatever you like. I have mpeg-1, 320x240, 30fps, CBR, 700kbps.
3. If all goes well, you'll get a preview of the first frame of the WMV9 movie and
you can simply click "Start" to begin converting. On my machine it takes about three
minutes to convert one minute of WMV. TMPGenc will create a .mpg and a log file.
Click here for a screenshot of how TMPGenc should look.
Step 2 (Converting the audio)
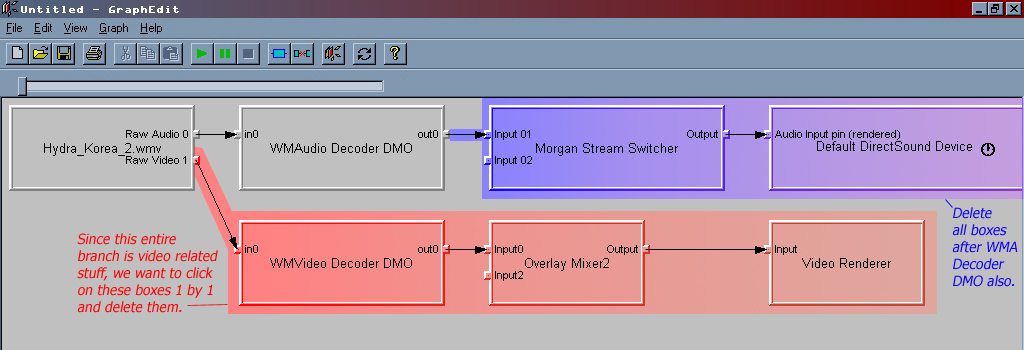
1. Run Graphedit and click File ---> Render Media File.In the browser, type *.wmv to make sure the WMV9 movie you want is displayed. Open it.
2. You will see boxes connected with lines. These represent the various steps the
movie goes through to be decoded and then played back on your PC. Notice that after the
first box, there are two separate branches... one for audio and one for video.
(Screenshot of audio and video forks.)
Since you're going to be dealing with audio at this point, you want to delete all the
boxes that branch out from the "Video 1" node on the first box (don't worry, this
doesn't hurt your movie). To delete the video-related boxes, just click each one to
highlight it, then tap the delete key (or click Edit ---> delete).
You also need to delete everything on the audio branch to the right of the
"WMAudio decoder DMO" box. You should end up with 2 boxes.
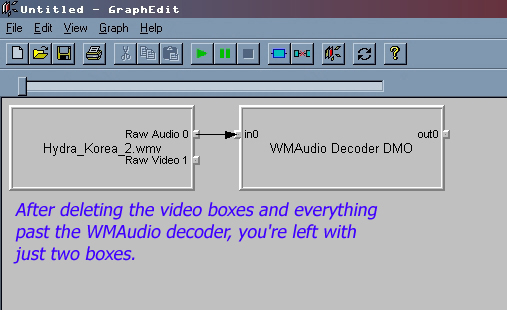
(Screenshot after deleting.)
3. Now we have an nothing but an audio stream, and that audio stream needs to be
written to a file somewhere so we can use it. To make that happen, click the blue
"Insert Filter" button, the small blue rectangle button on the right.
(Screenshot.)
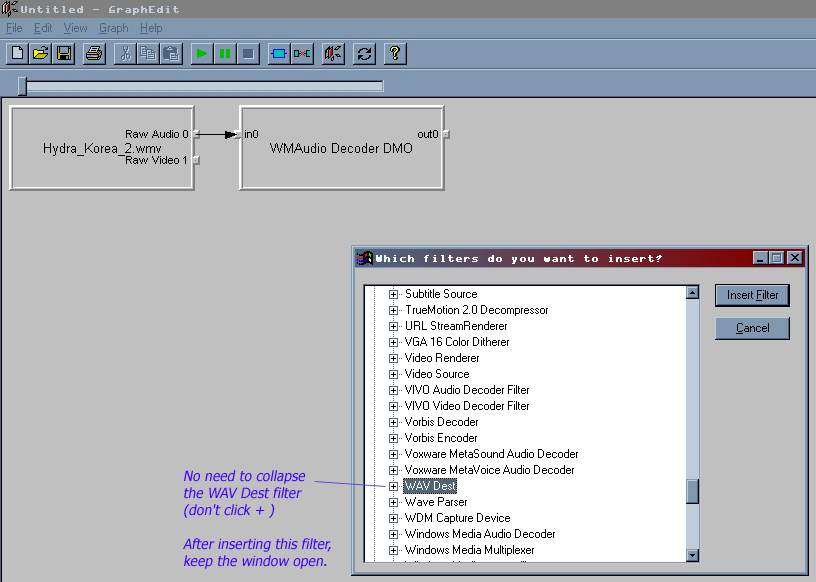
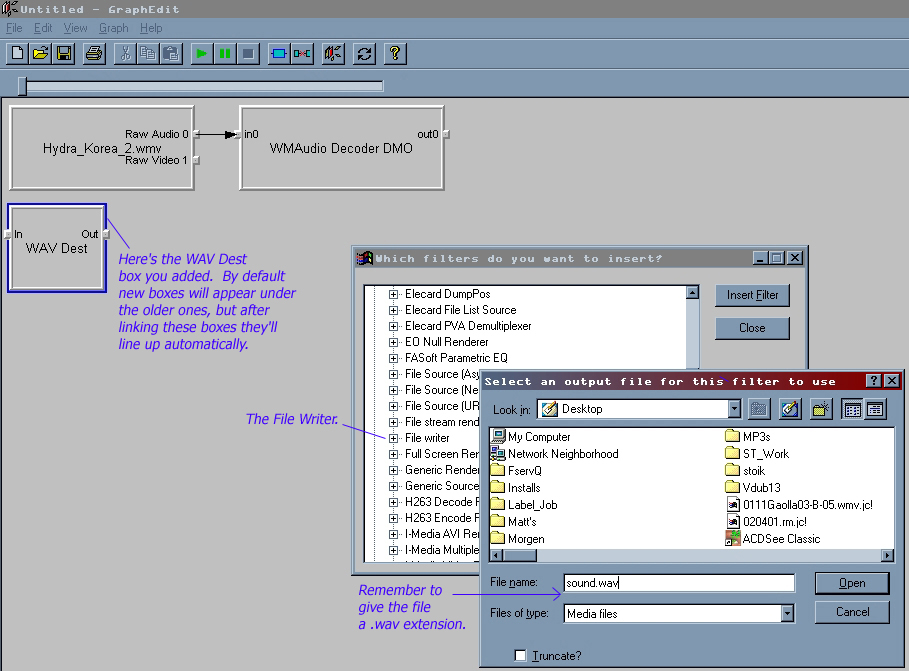
A dialogue box will pop up... it allows you to choose various filters to add to your
chart. We're going to make your 2-box graph a 4-box graph. For the first box, click the
+ next to "DirectShow Filters" to expand the list. Scroll through the list the list to
the W's to find the "WAV Dest" filter. Highlight and click the "Insert Filter" button,
(Screenshot.)but leave the browser open.
Next scroll up to the F's for "File Writer" and click "Insert Filter" again. A file
browser will pop up asking you where you'd like to save your file. Choose a directory
to save it to, and give it a name. End the name with .wav so that windows knows it's a
sound file. (Screenshot.)
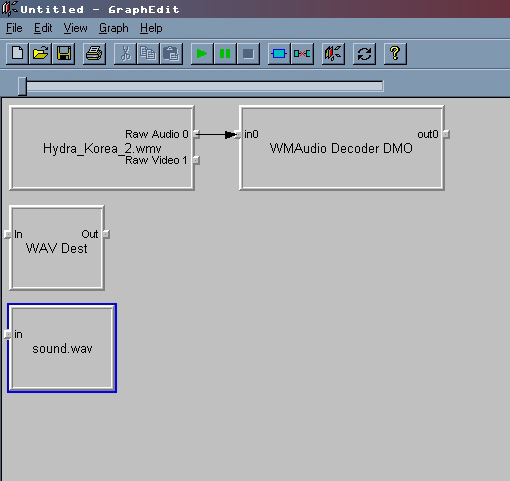
At this point you will have two new boxes sitting below the original pair.
(Screenshot.)
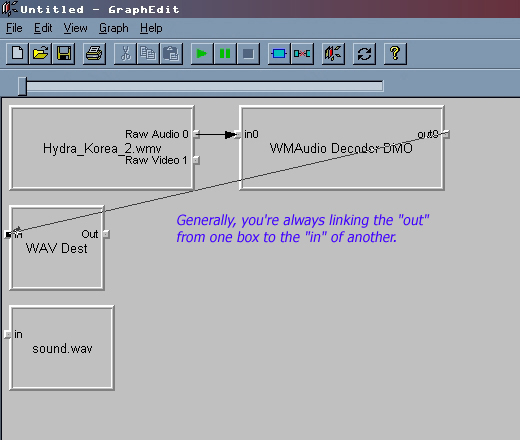
4. Click on the "Out0" node on the right side of the "WMAudio decoder DMO" box, and drag
your mouse over to the "In" node of the "WAV Dest" box below.
(Screenshot.)
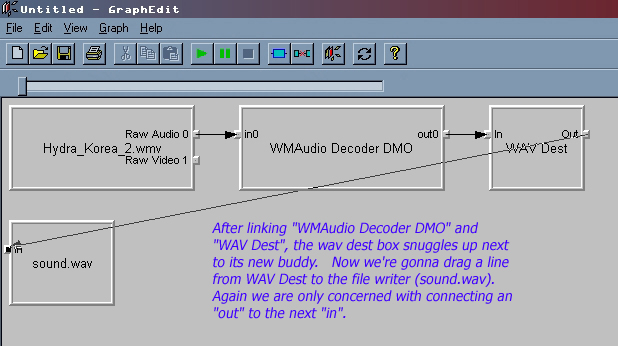
This tells graphedit to take the audio coming from the decoder and put it into WAV
format. The "WAV Dest" box will snap to the upper row of boxes. Next drag a line from
the "Out" node of "WAV Dest" to the "In" node of your filewriter box (which should have
the filename you gave for your WAV in step 3)
(Screenshot.)
The last box will snap in line with the other three.
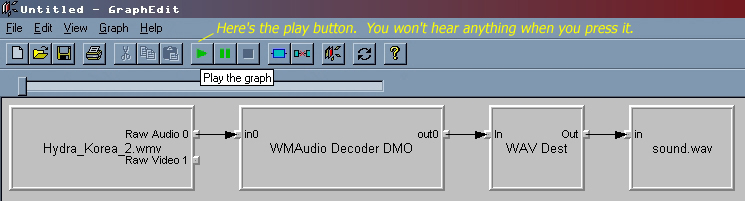
5. Press play. (Screenshot.)
The process should only take a couple of seconds and there's nothing to indicate it's
finished, so watch your hard drive light flicker and after a few seconds, then look in
the expected folder for your .WAV file. It should be there and should play fine in
Sound Recorder or Winamp.
Step 3 (Rendering the audio and video into a DIVX/MP3 movie)
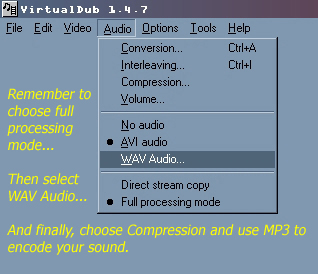
1. After that pain in the ass, this will be cake. First click Audio --->Full Processing Mode. Otherwise you can't encode it. Then click Audio ---> WAV audio
and browse for the WAV you made with Graphedit. Next, click Audio ---> Compression.
you will be asked to choose an audio codec. If you've got any kind of MP3 codec, go
with that. I also recommend checking the box that says "show all formats" and clicking
one of the 12 kb/s options at the top of the list. Click OK. (Screenshot.)
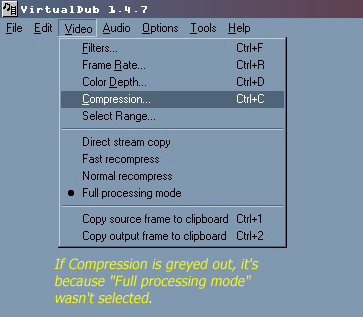
2. Next click Video ---> Compression. (Screenshot.)
Look for "Divx" in the list on the left side. I recommend choosing whichever divx codec
is the newest. You can click the "configure" button to fool with your divx settings.
I use settings similar to those in Step 1, part 2. Click OK.
3. Finally, click File --> Save as Avi... and give your file a name and location.
In short order (less time than TMPGenc took) you will have a nicely compressed divx.
